

Digital Collage: How to Begin
An easy way to create art on your phone.

I’ve had several people ask me how I create my digital collages. I realize that this really needs a video to go with it, but I don’t have enough bandwidth to upload a video from here so that will have to wait a few weeks. For now, here are some simple instructions for anyone that wants a beginner friendly way to create digital collage.
You might need to click on the photos in order to see the full image. The images are in order of the instructions.
The APP
I use Superimpose X for the bulk of my collage work. It allows you to combine images, use masks & blend modes and has a bunch of other features like warping & inverting colors. You don’t need to worry too much about those things if you’re just starting out. This app costs $4.99 USD.
Getting Started: Creating the Background


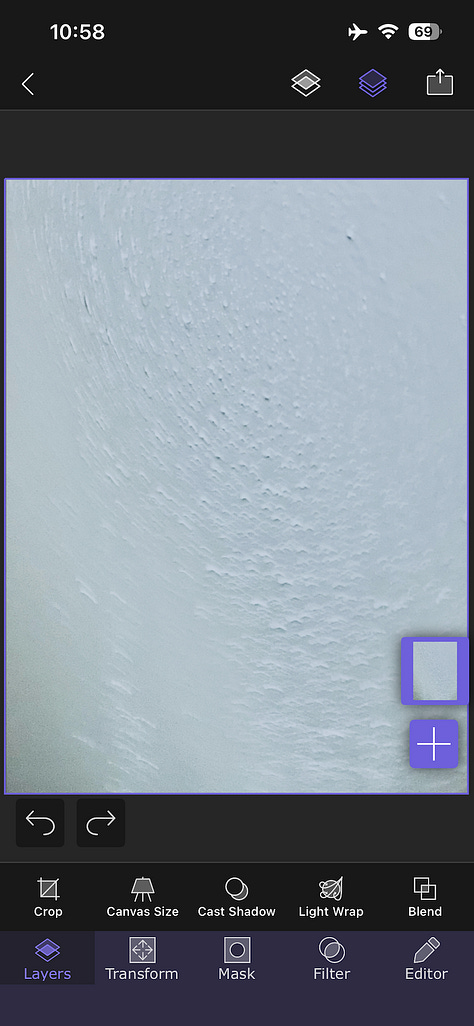
When you open the app, click on the + sign to start a new project. (The first time you open it, it might be bring you to a different screen but just click around until you find the + sign.)
After you click on the + sign, it will take you to your photos where you can choose your background image. If you sort your images into folders, it will show your folders at the bottom. (Make sure you use a high quality background image. I keep a few solid color, high quality background images for this purpose. If you start with a low quality, tiny image, you can’t fix it later. Your whole piece will be low quality and small.)
Do not auto mask your background image. You want a full background on which to work on. Think of this as your canvas. You wouldn’t want to start painting on a canvas that had a hole in it.
Layers & Masking
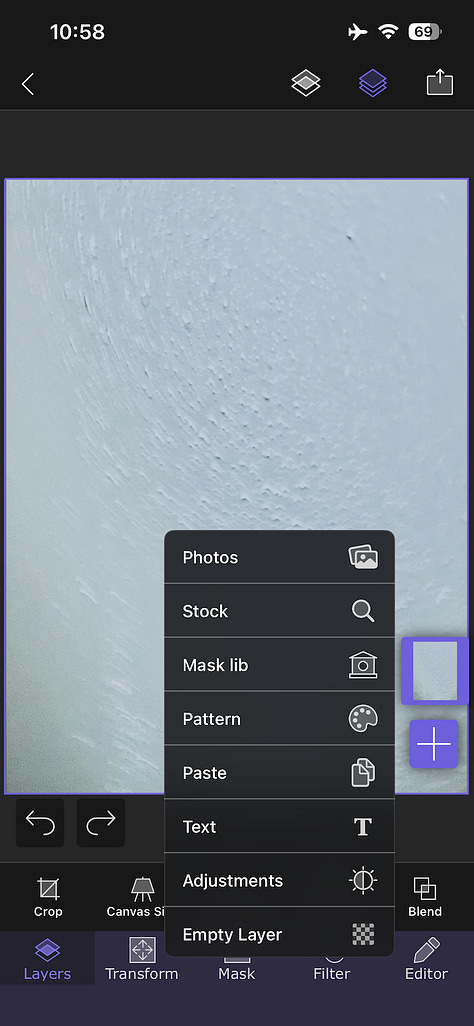
Now that you have your background created, this is where the fun begins! We can begin to add layers. Click on the + sign and it will again take you to your photos where you can select the image that you want to layer on.
For now, just use the photos you have on your device and click ‘photos’ to select one of your photos.
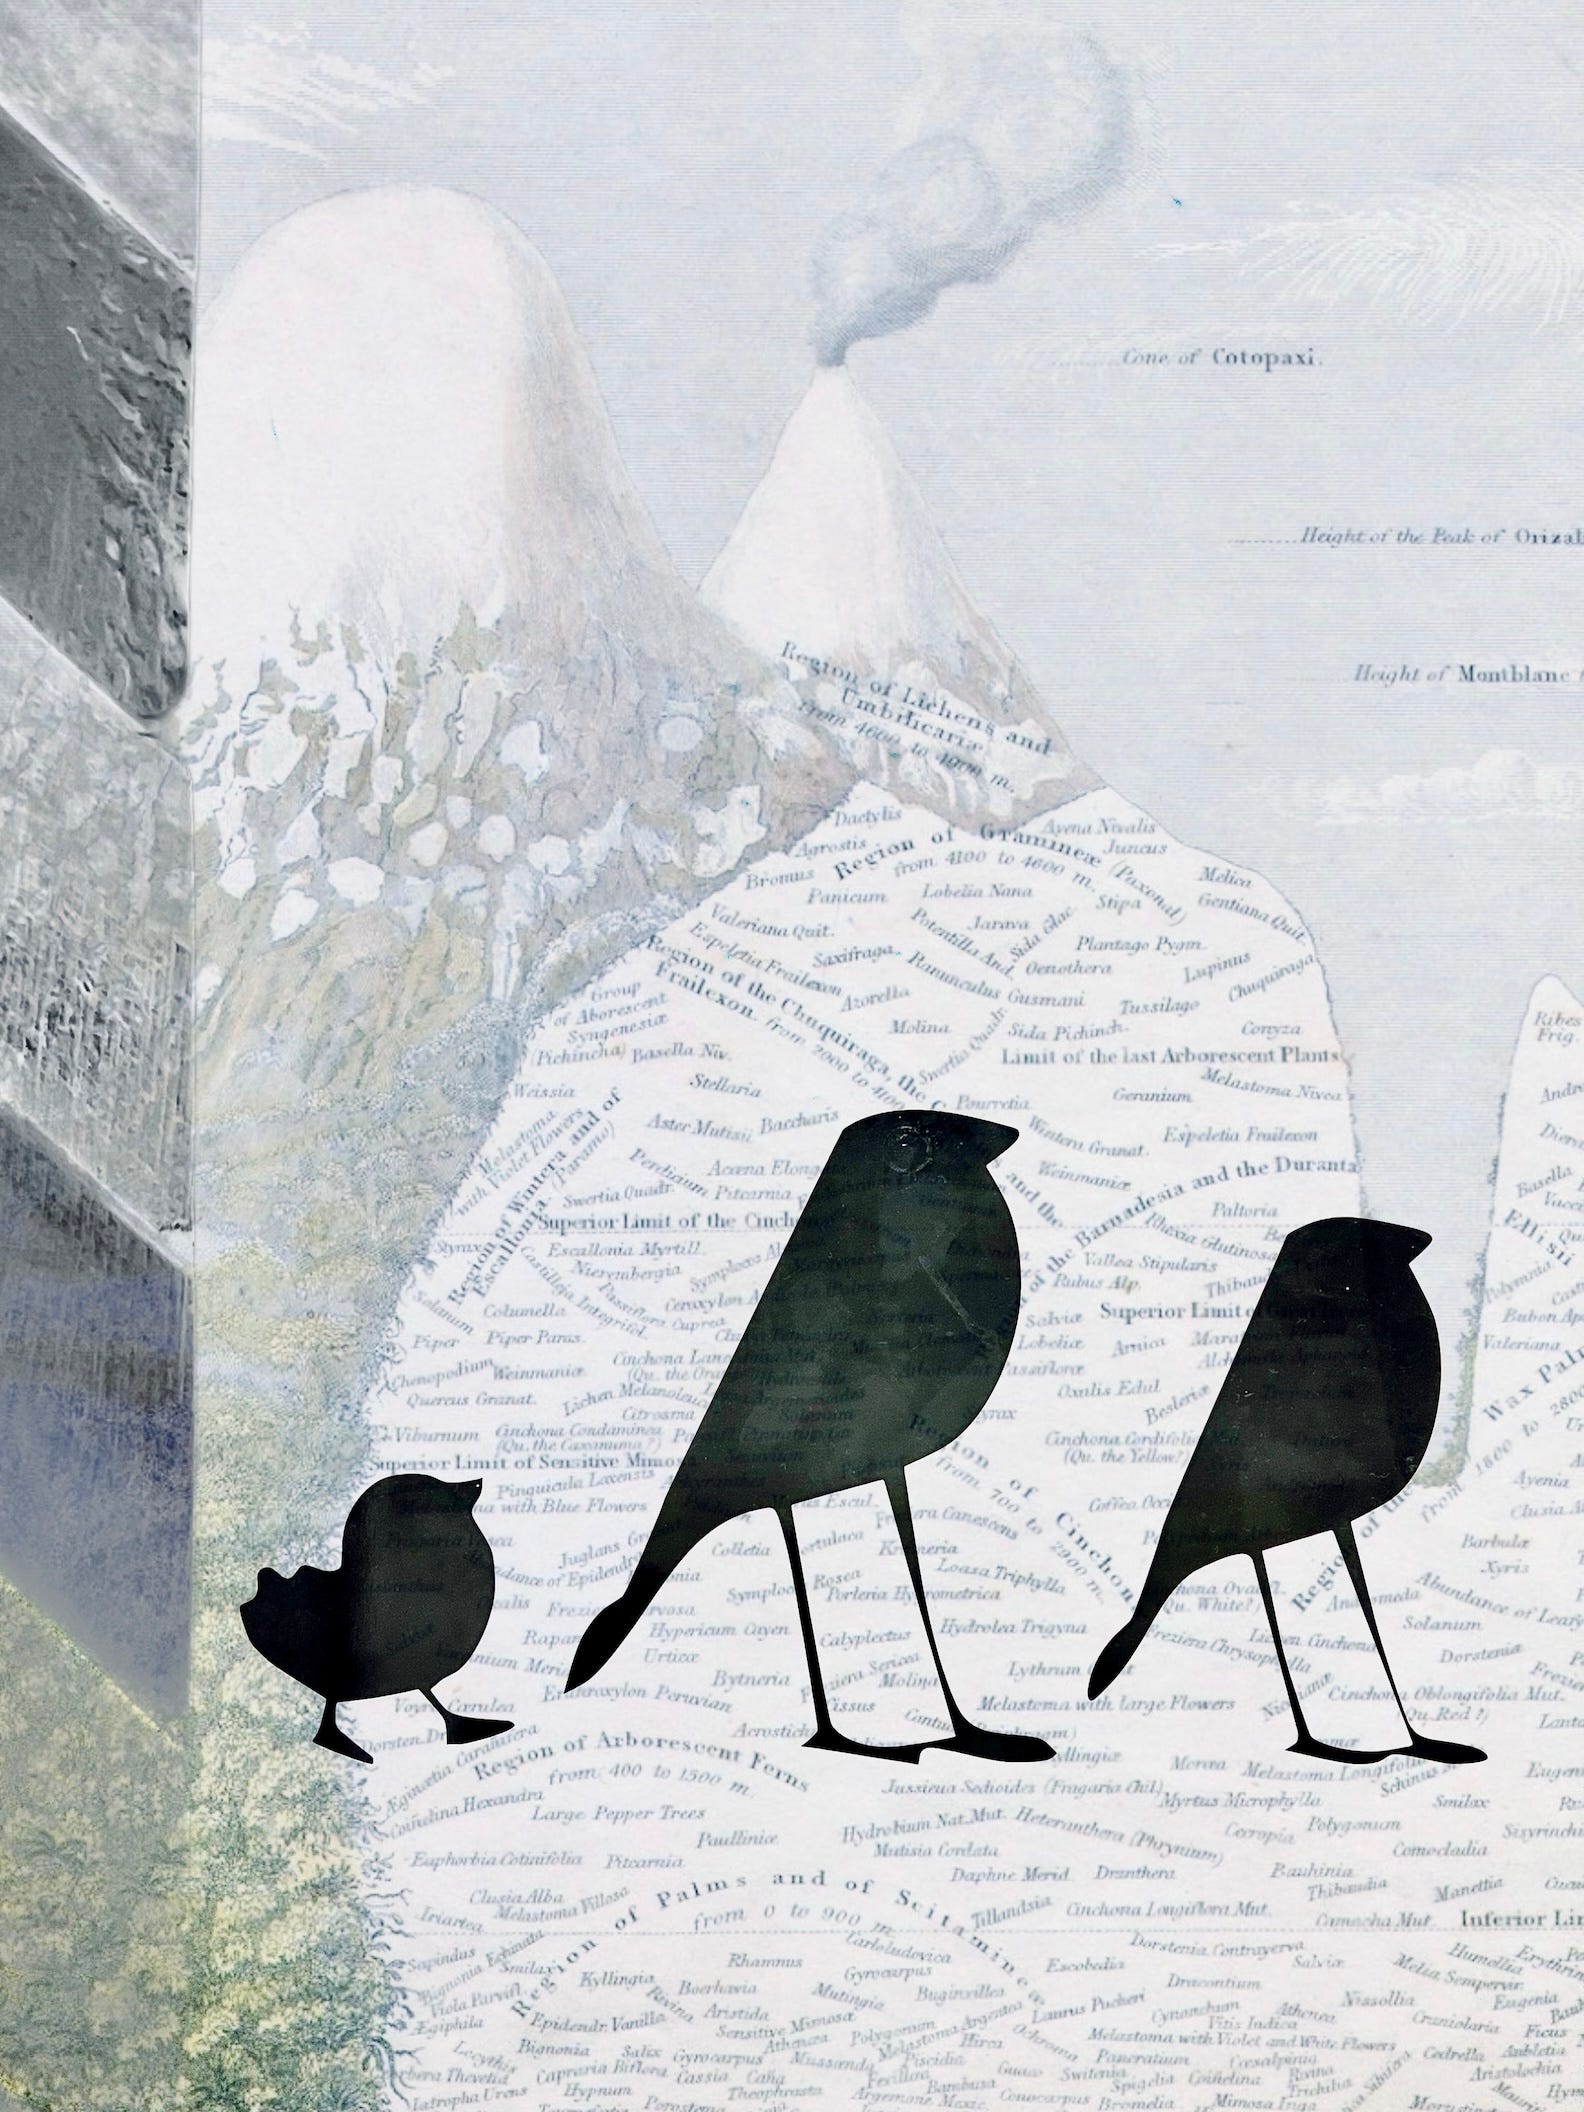
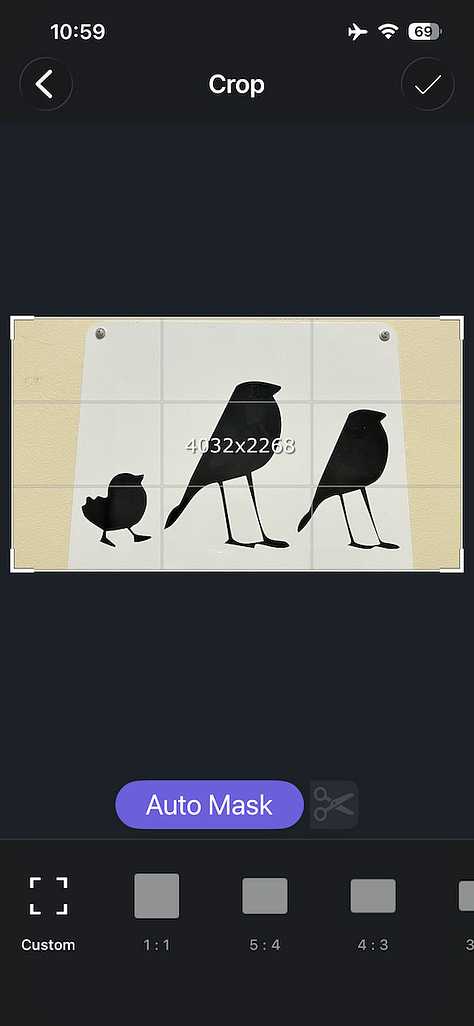
If you want to remove the background, you can click on ‘auto mask’. This doesn’t always work well, but generally does a decent job. If you have a background that is not too busy and high in contrast, then it generally works well. We’re just getting started here so practice with something that has a high contrast background like the bird image I’ve selected above.


Moving & Blending Images


If you’re happy with the auto mask click the check mark and it will take you back to your project.
Click on ‘transform’ in order to re-size the layer or move it around. (On the right side you will see tiny versions of every layer. The one highlighted in purple is the ‘active’ layer and anything you do will do it to that layer.)
Once you have the layer (image) placed where you want it, click on ‘layers’ on the bottom row and then on ‘blend’ on the second row up. Try clicking on each blend mode to see how it blends this layer with your background. You can get some really great effects from this and you can use the ‘opacity’ slider to increase or decrease the effect of the blend mode.
Adding & Duplicating Layers


I’ve repeated step #4 and added another layer here for my ‘real’ background for the image. It’s a bit light though so one way to deal with that is to duplicate that layer.
To duplicate a layer, just click on the layer on the right side and it will bring up a bunch of options for you. Click on duplicate. It will create a second layer of the same image and now you can change its blend mode, opacity, location, etc… just like you can with any other layer.
I’ve also added another layer to add some texture on the left side of the image. This is how the ‘collage’ part works. You just keep adding layers with different elements to your overall canvas.
Final Steps


To export, just click on the square with the arrow on the top right corner of your screen and it will give you all the normal export options.
For my final steps, I usually take my collages into another app to adjust colors, contrast, etc… My app of choice is Lightroom Mobile but Snapseed, Afterlight, the regular iPhone editing features all work really well. Basically, you can use any app that you would use on your photos to make final edits to your digital collages.
This is a really simplified explanation of the tools that I use to create my digital collages, but it’s a good starting point if you’re a beginner or would like to try it out for the first time. And if you do, I would love to see what you create!
I wanna try this🙂
Excellent tutorial, thanks for this! I’ve had Superimpose on my phone for years and it’s really dusty. You’ve given me some great ideas to relook at it.